
Handling Bees
by Steve McDaniel
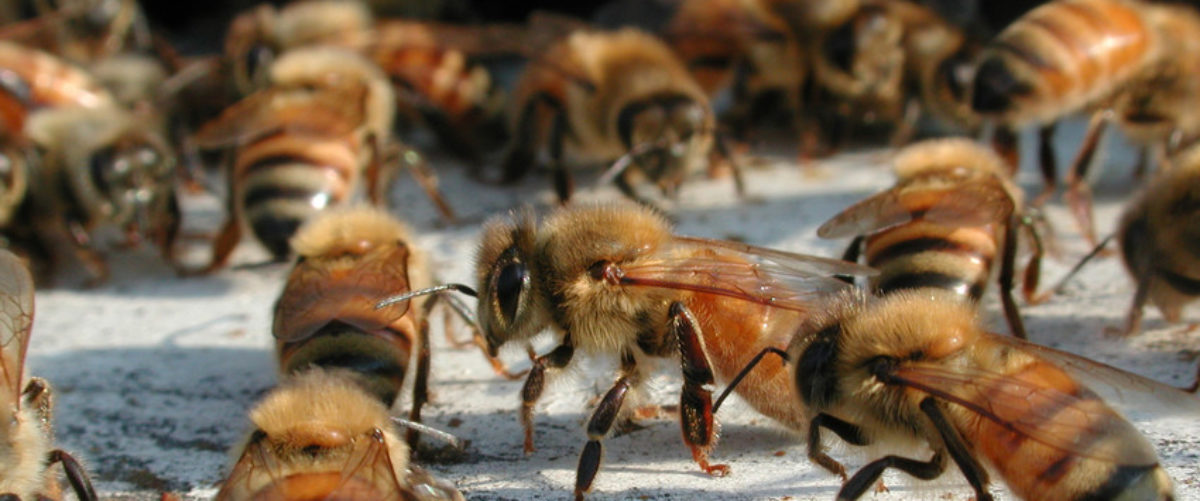
Opening a beehive is a scary proposition at first. After all, there are thousands of “stinging insects” in that box! Once you get used to handling them and realize that none of them wants to sting you (after all, they die if they sting), you will find opening a beehive to be exciting, interesting, and even relaxing. The bees teach you how to act— be slow, calm, careful, and respectful. They require your full attention and concentration, so all the cares of the world slip away as you smell the aroma of propolis and honey, hear the gentle hum of the bees, and watch the organized activities of the hive. If you are careful not to crush bees (the primary cause of stinging) and handle them gently and with the proper use of your tools and protective gear, you will only get an occasional sting. Yes, a sting does hurt, but if you scrape it out quickly with a fingernail or hive tool, you will get very little venom, so it becomes a minor annoyance, not something to fear.
Your smoker is your main tool for avoiding stings. A little smoke distracts the guard bees and moves them out of the way of places you don’t want them, such as the top bar where you have to put your fingers to lift a frame. A well-lit smoker will not go out when you need it and will provide smoke for hours.
Start with an empty smoker. Fire burns upward, so you need a good fire in the bottom, plenty of fuel above that, and something like a rag on top to partially choke down the fire. Light a medium-size (8”-10” square) piece of newspaper with a match or lighter, push it into the smoker using your hive tool, then add a little fuel, pumping the bellows vigorously until you have a good, hot fire. Add a little more fuel and pump until it is burning well. Now fill the smoker with more fuel, topped with a piece of cloth that almost closes off the fire, leaving a small vent for air and smoke to go through. Pump the bellows until you get plenty of thick, white, cool smoke, then stop. A little smoke, not a lot, should come out of the spout when you are not pumping the bellows. Your fuel can be any natural fiber or cellulosic fabric: cotton rags, pine needles, wood chips or scraps, sawdust or sticks, burlap, corncobs, etc. The world is full of free smoker fuel! Avoid anything that might be toxic, such as pressure-treated lumber, painted wood, cedar wood, synthetic fabrics, baler twine, or liquids that might produce fumes. At the end of the session, plug the smoker hole with a cork and lay it on its side to shut off the air flow and put out the fire. It will be cool in about ten minutes. The next time you light it, dump out the charcoal and use it to get your fire off to a good start. Never dump out hot coals! Many a brush fire has been started that way.
You may prefer to use a spray bottle with thin sugar syrup (about one part sugar to two parts water) instead of a smoker, and it works when the bees are generally calm, but a smoker is more effective.
Always wear a veil to keep bees away from your face, which can be unnerving even if they don’t sting. If a bee should get inside your veil, stay calm, step away from the hive, take off the veil, turn it upside-down, and let the bee fly out.
You should buy gloves and a suit but avoid using them unless you encounter a nasty hive. Wear them if you have to at first, but wean yourself off of them as you become more comfortable handling the bees. Gloves prevent you from feeling any bees that might be under your fingers, causing you to crush them and irritating the colony. They will sting anyone near you, and when you take off the gear, they’ll get you, too.
Open your hive near midday in sunny weather. If a honey flow is on, they are especially gentle. Avoid late-afternoon sessions, or when a thunderstorm is on its way, as they become more defensive. Pay attention to your neighbors, too, and don’t disturb the bees if they are nearby, swimming in their pool, or having a party. Give them a jar of honey once in a while, and stay on their good side.
Approach your hive from the rear or side and reach around to puff a little smoke into the entrance. Lift the top cover and puff some smoke under it. If it is really stuck, use a brick or stone to gently tap upward on the corners, breaking the propolis seal. Remove the top cover and place it on the ground upside-down. Push your hive tool under one corner of the inner cover and pry it upward. If it is still stuck, pry the other corner, too. You can even use two hive tools, one in each hand. Keep the tool in your hand (“palm” it) as you lift off the inner cover, puffing a little smoke under it, and stand it up alongside the hive, bees and all. Be careful not to crush any bees as you put it down in a place where you won’t kick it.
Now you are ready to pull out the first frame. Position your feet in a comfortable and stable stance as close to the hive as possible. Select a frame to pull, usually the second from the nearest side. The outer frames may be locked to the box with burr comb, and you want a frame least likely to have the queen. If there is any burr comb between the top bars, cut it away from the adjacent frames so it comes up with the frame you have selected. Loosen both ends of the frame by prying it sideways with your hive tool. Insert the end of the tool under the top bar near one end and pry it upward, using the adjacent frame as a fulcrum. Grasp the top bar near the end while you pry up the other end. Hold the frame securely in both hands and slowly pull it absolutely straight upward until it clears the other frames, giving any bees caught between the frames a chance to get out of the way. Tilting or twisting the frame will crush bees, getting you stung and possibly killing your queen.
Examine the frame on the side facing you, checking the brood pattern, looking for any diseased brood, and looking for the queen. If there are a lot of open cells with eggs, she may be there, and you want to be especially careful if she is. To check the other side, tilt the frame so the top bar is vertical, then spin it around so the other side faces you. When you have finished examining it, put the frame on the ground next to the hive, standing it on end so there are only two points touching the ground, to avoid crushing bees, and lean it against the hive. If it contains brood and the weather is cool, don’t keep it out more than a minute or two.
The next frame can easily be pried into the space where the first frame was, giving you some wiggle room. Puff a little smoke across the top bars to chase the bees from the area where you want to grasp the frame. Examine it the same way as the first, then replace it in the box, sliding it tightly against the outside frame, leaving plenty of room for removing the next frame. Continue with the other frames until you have seen what you want to see, then pry them back into their original positions and replace the first frame, lowering it straight into the box without crushing bees.
To remove the top box, pry it upward as you did the inner cover, puffing a little smoke between the boxes. Without letting it settle back into place, lift it off the hive and set it gently cater-cornered on the upside-down top cover on the ground, turning it so the bottom edges of the box rest on the edges of the top cover. If you set the super on a flat surface, you will crush many bees.
To put the super back on the hive, puff some smoke under the super, moving clustered bees up onto the frames, and smoke the bees on the top of the lower box. Hold the super over the lower box and tilt it so that only one corner touches down. Gently wiggle one edge down onto the box, giving the bees a chance to get out of the way. Jiggle the box up and down slightly as you lower it gently into place. If you do it right, there will be no crunching sound from crushed bees, and you will walk away, having replaced the inner and top covers the same way, without being stung.